English
 Español
 Français
 Português
 Pусский
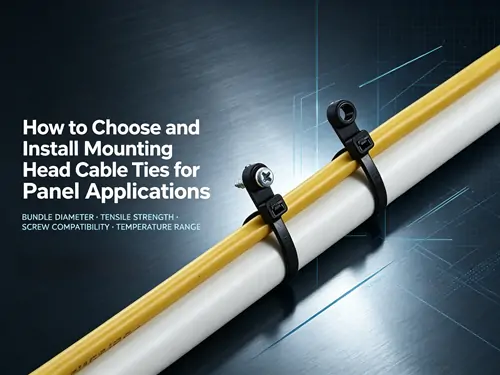
How to Choose and Install Mounting Head Cable Ties for Panel Applications
In control panel builds, automotive wiring harnesses, and industrial equipment assemblies, securing cable bundles to a surface is just as important as bundling them in the first place. These screw-mount ties combine bundling and fixing in a single component—a standard tie with an integrated mounting hole that allows it to be screwed directly onto a panel, chassis, or enclosure. This design eliminates the need for separate mounts or adhesive pads, reducing assembly time and improving reliability. This guide explains what to look for when selecting these fasteners and how to install them correctly.
What Is This Type of Cable Tie?
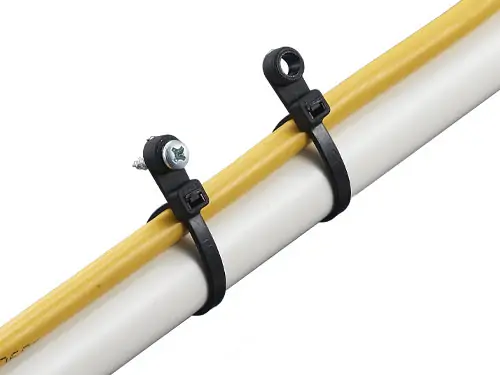
This style of tie features a built-in mounting hole or head at the base of the locking mechanism. After bundling wires, the tie is secured to a plate or panel using a screw passed through the mounting hole. This two-in-one design allows the tie to both organize cables and anchor them in place, preventing movement or tangling.
These fasteners are commonly used in electrical, automotive, and industrial applications where cable management is essential. They are particularly valuable in environments where vibration is present—the screw fixation provides a mechanical anchor that adhesive mounts cannot match.
To explore available configurations and view detailed specifications, visit the mounting head cable ties product page.
Key Selection Criteria
When selecting these panel-mount ties for your application, four factors matter most.
1. Bundle Diameter
The tie must be long enough to wrap around the cable bundle and still reach the locking head. These ties are available in various lengths—common options include 100mm, 145mm, 220mm, and 381mm. The maximum bundle diameter for each length is typically listed in the product specifications. Always leave a small margin—choosing a tie that is barely long enough can make installation difficult and may result in inadequate tension.
2. Tensile Strength
The tensile strength determines how much load the tie can hold before breaking. These fasteners are available in a range of tensile strengths, from approximately 8 kg (18 lbs) up to 55 kg (120 lbs). For lightweight cable bundles in control panels, lower tensile strengths may suffice. For heavy wiring harnesses or applications with significant vibration, higher tensile strengths are required.
3. Panel Thickness and Screw Compatibility
The mounting hole in the tie head must accommodate the screw size you plan to use. Different models have different hole diameters, so verify compatibility with your panel's mounting hardware. Additionally, consider the panel material—metal panels can accept self-tapping screws, while plastic or composite panels may require machine screws with nuts or threaded inserts.
4. Operating Temperature Range
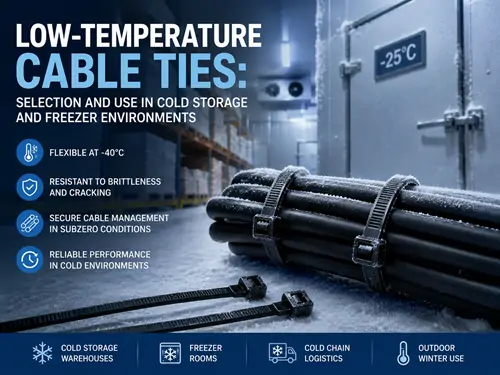
These panel-mount ties are typically made from NYLON66 and rated for continuous use between -40°C and 100°C. If your application involves higher temperatures—near engines, ovens, or industrial heat sources—verify that the temperature rating matches your environment. For extreme cold, the same -40°C lower limit applies to most nylon ties.
Installation Best Practices
Proper installation ensures reliable performance over the product's service life—typically about ten years in normal external environments. Follow these guidelines:
Pre-drill the mounting hole
For metal panels, pre-drill a pilot hole matching the screw diameter. For plastic panels, pre-drilling prevents cracking and ensures the screw threads engage properly.
Use the correct screw type
Self-tapping screws work well for thin metal panels. Machine screws with nuts are recommended for thicker panels or applications requiring high pull-out resistance. Avoid over-tightening—the screw should be secure without deforming the tie head.
Position the tie before tightening
Route the tie around the cable bundle, insert the screw through the mounting hole, and secure the screw to the panel before tensioning the tie. This sequence ensures the tie head is properly aligned with the bundle.
Apply even tension
Tension the tie until it is snug around the bundle—not so tight that it deforms the cable insulation, but tight enough to prevent movement. For vibration-prone applications, consider using a tensioning tool for consistent results.
Inspect after installation
Check that the tie head sits flat against the panel surface and that the screw is fully seated. The bundle should be secure with no visible slack.
Common Applications
| Application Area | Typical Use | Why These Ties Are Preferred |
|---|---|---|
| Control panels | Securing wire bundles to backplates | Screw fixation withstands vibration |
| Automotive wiring | Anchoring harnesses to body panels | Reliable mechanical anchor |
| Aerospace assemblies | Cable management in tight spaces | Low-profile, secure fixation |
| Industrial equipment | Organizing cables on machinery frames | Durable, long service life |
| Telecommunications | Cable routing in cabinets | Easy installation and rework |
Frequently Asked Questions
Q: What is the difference between a screw-mount tie and a standard tie with a separate mount?
A: A screw-mount tie has the mounting hole built directly into the tie head, eliminating the need for a separate adhesive or screw-mount base. This reduces component count, assembly time, and potential points of failure.
Q: What screw size should I use with this type of tie?
A: The appropriate screw size depends on the specific model. Check the product datasheet for the recommended screw diameter and head size. In general, the screw should pass freely through the mounting hole without excessive play.
Q: Can these ties be reused?
A: Most screw-mount ties are self-locking and designed for single use. Once tensioned and locked, the tie cannot be released without cutting. If rework is expected, consider releasable ties with separate mounts instead.
Q: What temperature range can these fasteners withstand?
A: Boese's panel-mount ties, made from NYLON66, are rated for continuous use between -40°C and 100°C. For applications outside this range, consult the manufacturer for alternative material options.
Q: How do I know which length to choose?
A: Measure the circumference of your cable bundle and add approximately 20-30mm for the locking head and tensioning. Then select the nearest available length that exceeds this measurement. Common lengths include 100mm, 145mm, 220mm, and 381mm.
Q: Are these screw-mount ties suitable for outdoor use?
A: Yes, but with considerations. NYLON66 offers good durability, and the service life in normal external environments is approximately ten years. However, prolonged UV exposure can degrade nylon over time. For outdoor applications, UV-resistant black ties or stainless steel alternatives may be more appropriate.
Conclusion
These screw-mount ties offer a simple, reliable solution for securing cable bundles to panels, enclosures, and equipment frames. The key to successful selection is matching the tie's length, tensile strength, and temperature rating to your application's specific demands. Proper installation—correct screw selection, appropriate tension, and thorough inspection—ensures the tie performs reliably over its expected service life.
To explore available configurations and view detailed specifications, visit the mounting head cable ties product page. For application-specific recommendations or assistance with selection, contact the Boese sales team directly.
Disclaimer: This article is provided for general informational purposes only and does not constitute professional engineering advice or product warranty. Temperature ratings, tensile strengths, and service life estimates are based on manufacturer specifications and general industry practices. Buyers should independently verify all product specifications with their supplier and, where appropriate, engage qualified professionals to assess product suitability for their specific applications. Actual performance depends on operating conditions and installation practices.